Hi All,
We’ve been getting a number of requests in the community for help integrating Morse Micro HaLow onto a number of Raspberry Pi boards - specifically those running the Raspberry Pi OS. While some users have been successful with these integrations, and contributed their efforts back to the community (for example HaLow Integration on Raspberry Pi 5 and Successful bring up of HaLow on a Raspberry Pi Zero 2W with NAT forwarding!), we wanted to create a more specific build thread so we can highlight particular tips, and add some application specific detail to porting HaLow than what is not in the scope of App Note 24.
Before You Begin
Morse Micro ships an evaluation kit, the EKH01, based on a Raspberry Pi 4B. These evaluation kits run the Morse Micro OpenWrt fork out of the box. As one of our primary test platforms, we recommend users use Morse Micro’s OpenWrt fork where possible.
If you still wish to proceed with a Debian OS such as the Raspberry Pi OS. Continue reading!
This guide is based on some of the steps described in App Note 24. For at least this first post, we’re focused on only bringing the interface up as a client to an existing network, leveraging the hosts existing user space software for connection management.
Hardware Used
For this guide we’re using the following hardware:
Note that the Morse Micro MMECH06 is the hat used in the EKH01 mentioned earlier. While not purchasable on its own, the design files are publicly available. This guide will additionally mention the software configuration required for the SeeedStudio WM6108 and SeeedStudio WM1302 Pi Hat as a carrier.
Preparing the Raspberry Pi
Prepare an SD card with Raspberry Pi OS.
For the purposes of this guide we will be using the last bookworm release of the Raspberry Pi OS. This can also be installed with the Raspberry Pi imager.
📝Kernel Support
The 1.16.4 Morse Micro software release supports the following kernel versions:
- 4.9.80
- 4.14.98
- 4.19.66
- 5.4.83
- 5.10.11
- 5.15.61
- 6.1.21
- 6.6.19
- 6.12.21
From 1.15.3, patching the kernel is practically required, so sticking as close to one of these versions as possible will make integration significantly smoother. In a subsequent post to this thread, we will walk through applying the patches to a more recent bugfix version of the kernel, and modifying the Morse driver to suit an API change in later versions of 6.12.
Install Software Dependencies
To keep this guide simple, we will be compiling the Linux kernel, and the Morse Micro driver on the Raspberry Pi. Boot the Pi, and install necessary tools for compiling the kernel.
sudo apt install fakeroot build-essential libncurses-dev xz-utils libssl-dev flex libelf-dev bison git dtc
Get Required Sources
Linux Kernel
As mentioned, we will be patching the kernel. So instead of fetching sources from apt, we will be cloning them from GitHub. The release notes for 2025-05-13 indicate that we need commit hash 3dd2c2c, tagged as stable_20250428. Clone this with
cd ~
git clone --branch stable_20250428 https://github.com/raspberrypi/linux
cd linux
This will take some time to clone, as the kernel is large. Once complete we can add the Morse Micro remote containing necessary patches with:
git remote add morse https://github.com/MorseMicro/rpi-linux.git
git fetch morse
Once fetched, we can cherry-pick the 6.12.21 Morse Micro patches onto the kernel version we need with
git cherry-pick b37a3f6bb..mm/rpi-6.12.21/1.16.x
In this instance, two patches will fail due to changes between 6.12.21 and 6.12.25! These patches won’t be too difficult to fix. On failure use git status to see what has failed, and resolve the conflicts as required.
Morse Micro Driver
Simply get this from the Morse Micro GitHub
cd ~
git clone https://github.com/MorseMicro/morse_driver.git
cd morse_driver
git submodule --init --recursive
Morse Micro Firmware Binaries
When downloading Morse Micro firmware, make sure it matches the driver you are using!
cd ~
git clone https://github.com/MorseMicro/morse-firmware.git --branch 1.16
Building and Installing the Kernel
Now that we have everything prepared. Compile the kernel.
cd ~/linux
make bcm2712_defconfig
sed -r -i 's/CONFIG_LOCALVERSION=\"(.*)\"/CONFIG_LOCALVERSION=\"\1-morse\"/g' .config
make -j6 Image.gz modules dtbs
Note the CONFIG_LOCALVERSION will be -v8-16k-morse.
This kernel compilation will take some time, especially when running it on a Raspberry Pi.
Then install the kernel modules, and place the kernel into the boot partition.
sudo make -j6 modules_install
sudo cp arch/arm64/boot/Image.gz /boot/firmware/kernel_2712-morse.img
Building and Installing the Morse Micro driver
Run make in the Morse Micro source, pointing at the kernel you just compiled. See the Kconfig file for descriptions of other configuration options available to the driver.
In our case, we’re only compiling the SPI driver.
cd morse_driver
make KERNEL_SRC=~/linux/ CONFIG_WLAN_VENDOR_MORSE=m CONFIG_MORSE_SPI=y CONFIG_MORSE_USER_ACCESS=y CONFIG_MORSE_VENDOR_COMMAND=y
Then install into the modules directory with
sudo make KERNEL_SRC=~/linux modules_install
Installing Morse Micro Chip Firmware
The morse-firmware repository contains both Morse Micro chip firmware, and module configuration files for our module partners who have agreed to allow us to distribute the files.
cd ~/morse-firmware
sudo make install
📝 Board Configuration Files (BCFs)
The driver will attempt to read the “board type” from the chip, if the module vendor has programmed it. This enables automatic selection via the
bcf_boardtype_symbolic links installed into/lib/firmware/morse/.If the module vendor has not programmed OTP, you will need to specify it. For example, for the Quectel FGH100MHAAMD used on the SeeedStudio WM6108, you will have to create the following file to
/etc/modprobe.decho "options morse bcf=bcf_fgh100mhaamd.bin" | sudo tee -a /etc/modprobe.d/morse.conf
Creating a Device Tree Node
Device Trees are the biggest challenge for most users! For SPI and SDIO devices, they are unavoidable. If using USB (with MM8108), you can skip this section! Before constructing a device tree, a user should find the schematics for any carrier board used and map the Host Processor GPIO pins to the Morse Micro Wi-Fi HaLow module pins.
In our case, we’re using a Morse Micro MMECH06 from an EKH01 configured for SPI. These two schematic snippets should be sufficient to build the device tree:


From this, we can build the following table:
| MM6108 | Raspberry Pi |
|---|---|
| RESET | GPIO5 |
| BUSY | GPIO7 |
| WAKE | GPIO3 |
| INTERRUPT | GPIO25 |
| SCLK | GPIO11 |
| MOSI | GPIO10 |
| MISO | GPIO9 |
| CS | GPIO8 |
Note that this carrier board has a JTAG RESET connected (GPIO4), which we should verify is in the correct deasserted state to ensure the chip boots.
Now that we have the table, we can construct a devicetree overlay file. For the MMECH06 on a Raspberry Pi 5 we create the following, morse-spi.dts:
morse-spi.dts
/dts-v1/;
/plugin/;

/ {
        compatible = "brcm,bcm2835", "brcm,bcm2836", "brcm,bcm2708", "brcm,bcm2709", "brcm,bcm2711";

        fragment@0 {
                target = <&spi0>;
                frag0: __overlay__ {
                        pinctrl-0 = <&rp1_spi0_gpio9 &rp1_spi0_cs_gpio7 &morse_wake &morse_trst &morse_busy &morse_irq &morse_reset>;
                        cs-gpios = <&gpio 8 1>;
                        #address-cells = <1>;
                        #size-cells = <0>;
                        status = "okay";

                        mm6108: mm6108@0 {
                                compatible = "morse,mm610x-spi";
                                reg = <0>;
                                reset-gpios = <&gpio 5 0>;
                                power-gpios = <&gpio 3 0>,
                                              <&gpio 7 0>;
                                spi-irq-gpios = <&gpio 25 0>;
                                spi-max-frequency = <50000000>;
                                status = "okay";
                        };
                        spidev@0 {
                                reg = <0>;
                                status = "disabled";
                        };
                        spidev@1 {
                                reg = <1>;
                                status = "disabled";
                        };

                };
        };

        fragment@1 {
                target = <&rp1_spi0_cs_gpio7>;
                frag1: __overlay__ {
                        function = "gpio";
                        pins = "gpio8";
                        bias-pull-up;
                };
        };

        fragment@2 {
                target = <&gpio>;
                frag2: __overlay__ {
                        morse_wake: morse_wake {
                                function = "gpio";
                                pins = "gpio3";
                                output-high;
                                bias-disable;
                        };

                        morse_busy: morse_busy {
                                function = "gpio";
                                pins = "gpio7";
                                input;
                                bias-pull-down;
                        };

                        morse_irq: morse_irq {
                                function = "gpio";
                                pins = "gpio25", "gpio26";
                                bias-pull-up;
                                input;
                        };

                        morse_trst: morse_trst {
                                function = "gpio";
                                pins = "gpio4";
                                bias-disable;
                                input;
                        };

                        morse_reset: morse_reset {
                                function = "gpio";
                                pins = "gpio5";
                                output-high;
                                bias-disable;
                        };
                };
        };

        fragment@3 {
                target = <&rp1_spi0_gpio9>;
                frag3: __overlay__ {
                        bias-disable;
                };
        };
};
This file contains device tree “fragments” which are used to modify, at boot time, the flattened device tree handed to the kernel by the bootloader. The base devicetree file for the Raspberry Pi 5 can be found at arch/arm64/boot/dts/broadcom/bcm2712-rpi-5-b.dts in the Linux kernel source.
The first overlay fragment, fragment@0, modifies the spi0 node to claim a number of pin configurations with the pin controller (see pinctrl-0); sets the cs-gpios as required for the board; creates a new mm6108@0 child node; and disables the other spidev nodes configured by default on the Raspberry Pi DTS.
The mm6108 node first sets the compatible, morse,mm610x-spi to correctly match against our driver; sets reset, wake, busy, and interrupt gpios; and enables the node with status="okay". The reg = <0> line in this node tells the SPI host controller that the MM6108 is on the first chip select line!
The second fragment overrides the default SPI CS definition, rp1_spi0_cs0_gpio7, to point to GPIO 8 instead.
The third fragment creates all additional required GPIO configurations as their own nodes. Note that these are the labels claimed by the spi0 pinctrl-0 property. This sets functions to GPIO and pullup/pulldown states as required for each pin.
On the RPi5 we noticed rpi1_spi0_gpio9, a node which sets GPIO9, 10, 11 to the correct “alternate function” for SPI has pull downs enabled by default. This conflicts with the pull ups on most carrier boards. We disable this internal bias so high and low states can be correctly defined.
Wow, bit of a mouthful! Now that we have morse-spi.dts, we can compile it into a binary overlay file as required by the kernel.
dtc -I dts -O dtb morse-spi.dts -o morse-spi.dtbo
Then, install this into the overlays folder in the bootloader partition.
sudo cp morse-spi.dtbo /boot/overlays/morse-spi.dtbo
Configuring the Bootloader
Now that everything is installed, we can configure the Raspberry Pi bootloader to start out new kernel instead, and enable the device tree overlays we created.
echo "dtoverlay=morse-spi" | sudo tee -a /boot/firmware/config.txt
echo "dtparam=spi-on" | sudo tee -a /boot/firmware/config.txt
echo "kernel=kernel_2712-morse.img" | sudo tee -a /boot/firmware/config.txt
Now we can reboot the device, and if everything is configured properly we should have a second Wiphy show up in iw phy.
Connecting to a HaLow network
Due to a lack of 802.11ah support in the Linux kernel, the Morse Micro driver pretends to be an 802.11ac device. This means it shows up in the kernel with 5 GHz frequencies!
For basic functionality, this allows it to work out of the box with most user space tooling! Now that we have a driver loaded, we can connect the Raspberry Pi to a monitor (or via VNC) and first set the country from the top right

Most MM6108 devices only support USA, Australia, and Canada.
We can open the connections dropdown again, and expose the scan list (note the 5G)

Allowing us to select a network and connect.
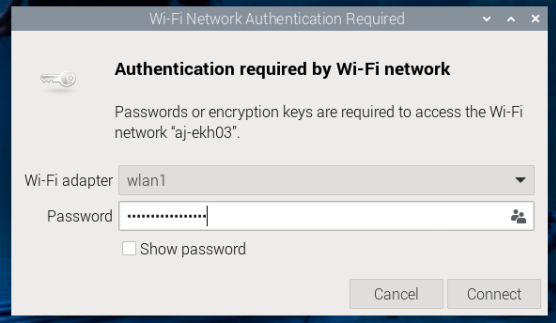
Type in the password, and it should connect!

I hope this is helpful for some of you in the community!
Additional Notes
Additional Notes
- The 5G channel faking is convenient, especially for older systems, but it can get very confusing. The Morse Micro OpenWrt fork has a large amount of changes included to unwind that channel faking, and present the right channel information.
- We are fixing this properly! But it is a slow process. Morse Micro has been very active in the Linux kernel over the last 6 months submitting patches for 802.11ah support. Soon, we will submit a “native” 802.11ah driver to the upstream kernel - though it will be minimally AP + station only at first.
- Patching the Linux kernel is challenging, but necessary for many features. You may not need all of the kernel patches if you’re not using particular features of the Morse driver (eg Mesh, channel switch announcements, SPI). In this case, you could opt for dropping the corresponding patches, particularly if it makes integration simpler. Read the patch commit messages for when they are required.
Other Hardware
At the start, I promised the device tree for the SeeedStudio WM6108 on a WM1302 carrier. From the WM6108 schematics and the WM1302 hardware overview we can construct the following table
| MM6108 | WM1680 | WM1320 | RPi |
|---|---|---|---|
| SPI Clock | 45 | 23 | GPIO11 |
| SPI MOSI | 49 | 19 | GPIO10 |
| SPI MISO | 47 | 21 | GPIO9 |
| SPI CS | 51 | 24 | GPIO8 |
| SPI IRQ | 10 | 29 | GPIO5 |
| RESETN | 22 | 11 | GPIO17 |
| WAKE | 33 | 16 | GPIO23 |
| BUSY | 31 | 18 | GPIO24 |
This allows us to create the following wm6108-spi.dts for the Raspberry Pi 5.
wm6108-spi.dts
/dts-v1/;
/plugin/;

/ {
        compatible = "brcm,bcm2835", "brcm,bcm2836", "brcm,bcm2708", "brcm,bcm2709", "brcm,bcm2711";

        fragment@0 {
                target = <&spi0>;
                frag0: __overlay__ {
                        pinctrl-0 = <&rp1_spi0_gpio9 &rp1_spi0_cs_gpio7 &morse_wake &morse_trst &morse_busy &morse_irq &morse_reset>;
                        cs-gpios = <&gpio 8 1>;
                        #address-cells = <1>;
                        #size-cells = <0>;
                        status = "okay";

                        mm6108: mm6108@0 {
                                compatible = "morse,mm610x-spi";
                                reg = <0>;
                                reset-gpios = <&gpio 17 0>;
                                power-gpios = <&gpio 23 0>,
                                              <&gpio 24 0>;
                                spi-irq-gpios = <&gpio 25 0>;
                                spi-max-frequency = <50000000>;
                                status = "okay";
                        };
                        spidev@0 {
                                reg = <0>;
                                status = "disabled";
                        };
                        spidev@1 {
                                reg = <1>;
                                status = "disabled";
                        };

                };
        };

        fragment@1 {
                target = <&rp1_spi0_cs_gpio7>;
                frag1: __overlay__ {
                        function = "gpio";
                        pins = "gpio8";
                        bias-pull-up;
                };
        };

        fragment@2 {
                target = <&gpio>;
                frag2: __overlay__ {
                        morse_wake: morse_wake {
                                function = "gpio";
                                pins = "gpio23";
                                output-high;
                                bias-disable;
                        };

                        morse_busy: morse_busy {
                                function = "gpio";
                                pins = "gpio24";
                                input;
                                bias-pull-down;
                        };

                        morse_irq: morse_irq {
                                function = "gpio";
                                pins = "gpio5";
                                bias-pull-up;
                                input;
                        };

                        morse_reset: morse_reset {
                                function = "gpio";
                                pins = "gpio17";
                                output-high;
                                bias-disable;
                        };
                };
        };

        fragment@3 {
                target = <&rp1_spi0_gpio9>;
                frag3: __overlay__ {
                        bias-disable;
                };
        };
};
Make sure to set the BCF options in modprobe.d when using this hardware!
We will follow up shortly with a post for any changes for the latest Raspberry Pi OS based on Trixie!
